Showing posts with label being crafty. Show all posts

Tuesday, July 17, 2012

Angry Bird Cupcake Toppers


Like much of the world, my family is fond of the game Angry Birds. I played it for about a week. To say it was obsessive is a little of an understatement. That game was all I could think about. I couldn't sleep. When I did sleep, I dreamed about those stupid birds. I knew it was time to step away for good when one night, I was stuck on a particular board. I can't tell you how many times I played it, and I thought I had it all figured out. This was it: I was going to kill all those stinkin' pigs. The last bird flew (it was one of those egg-dropping white birds), I let the egg drop...and I missed the last pig. I was so frustrated, I threw my iPad across the room! And that, my friends, was the last time I played ANGRY Birds.

Anywho, Pierce loves the game, and is actually quite good at it. His birthday was a few months ago, and we'd planned to have some boys from his Sunday School class over for their bi-weekly devotional. I thought it would be great for Pierce to celebrate his birthday with them, so I wanted to provide some cupcakes. I couldn't do just plain ol' cupcakes, though. I decided some sort of Angry Bird cupcake toppers would be cute. The only store-bought things I could find were those little plastic rings. Not exactly what I had in mind. I decided to look around on one of my favorite sites, Pinterest. Surely, I could find good ideas for making them myself. I was surprised that I couldn't! There were lots of pictures of Angry Bird cupcakes, but they had either come from a bakery, been made by someone who'd given no instructions to help you replicate them, or they were pictures of marzipan toppers you could buy (VERY expensive, I might add!). What to do? As usual, I posed the question to my friends on Facebook. One of my friends that is quite the artist, shared with me a picture of a groom's cake she had just finished for a friend's wedding. She had replicated their wedding invitation by cutting flower and bird shapes out of sugar sheets. She had a lot left over, and offered them to me. Most of the colors I needed were there: red, blue, yellow, white, and green. Perfect!


I was able to find these black ones at my local Wal-Mart. It was about $5 for a pack of 2- 8 1/2" x 11" sheets.
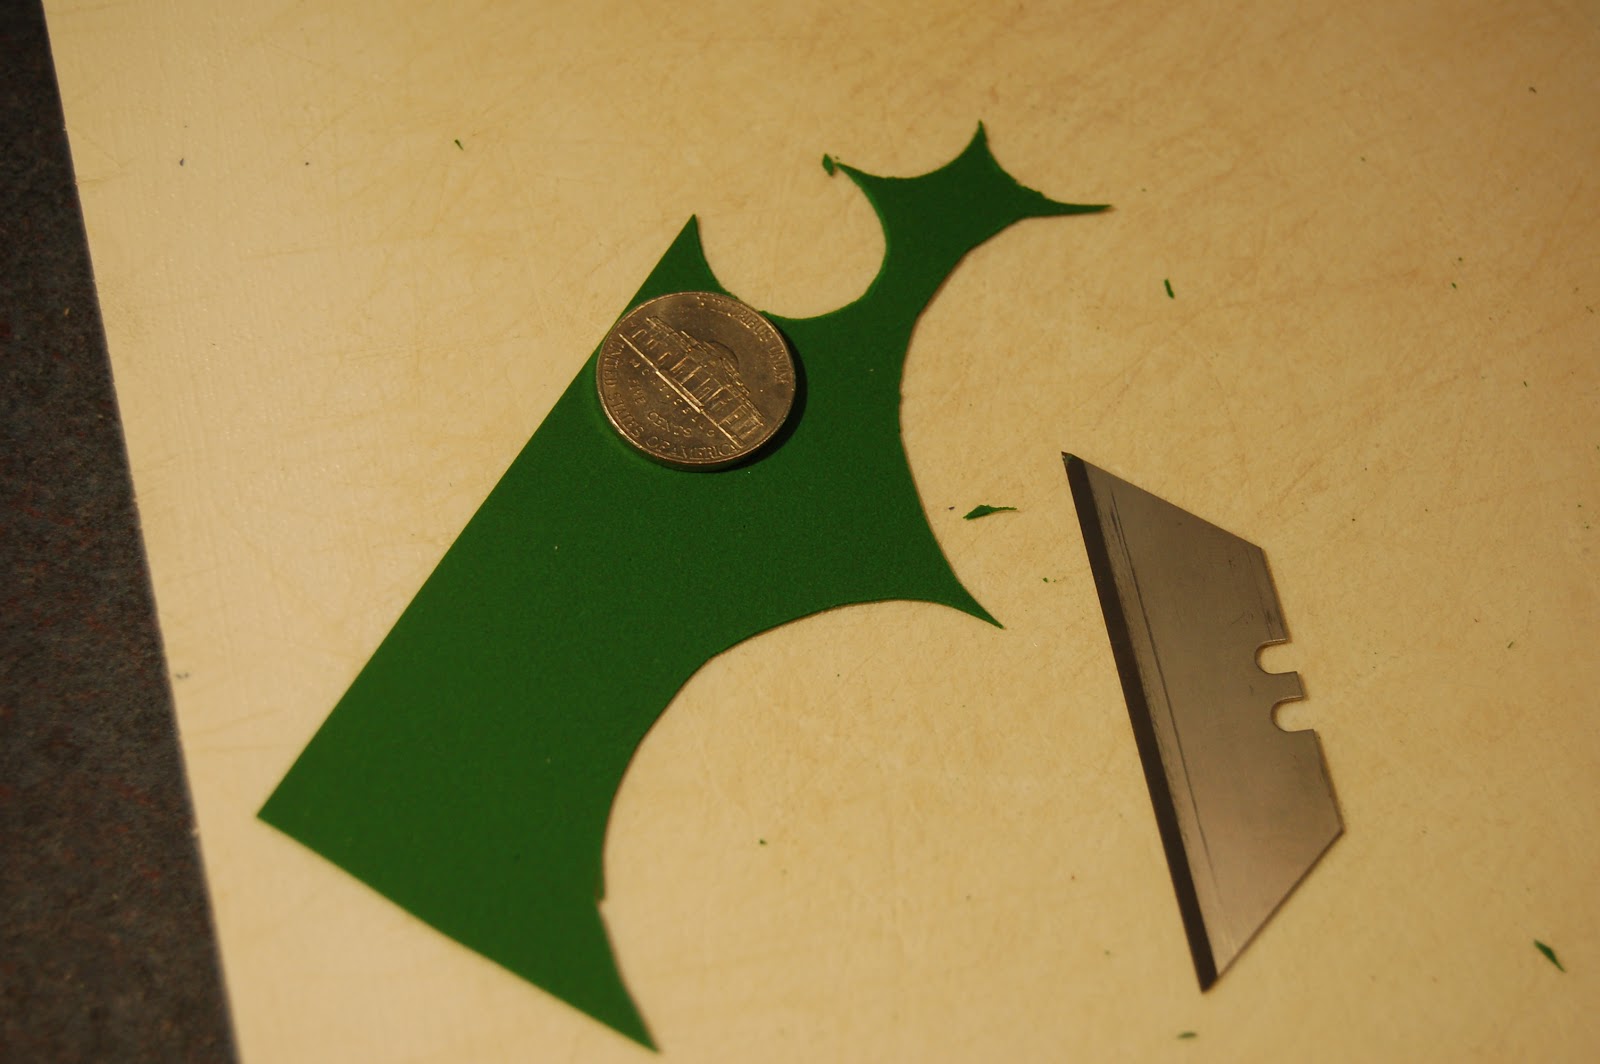


I started with the pigs. I used the smallest plastic container I could find as my circle for their bodies. I traced around the container with a razor blade. For their snout, a nickel seemed just the right size.


For the pigs' nostrils, I used a straw to cut them out of the black sugar sheets. 


To save myself some time (and sanity), I bought a pack of sugar eyes at JoAnn's. To make them stick, as well as the snouts and nostrils, I used just a touch of canned frosting. I used the same size circle for the blue birds, but I used a Campbell's soup can for the red birds. The yellow birds were easy; I just cut triangles and rounded off the corners a bit. I free-handed the white bibs, beaks, eyebrows and feathers...


...like so! My one mistake was putting these on the frosted cupcakes the night before the party. The sugar sheets start to melt just slightly from the moisture of the frosting, so the next morning, my birds were a little droopy. It's best to wait right before serving to place them on the cupcakes.

So there you have it! I wouldn't dare call myself an artist, so if I can make these, you can, too. I should mention that the parents of the teenage boys were quite impressed; the boys, not as much. They were more interested in eating them than looking at them. Typical. Oh well! 

Friday, February 10, 2012

Valentine's Day? ALREADY?!

Anyone know how I can slow down time? I've been meaning to follow up on the post I wrote about this year's goals, but since it's close to Valentine's day, I thought this might be more appropriate. Our anniversary is December 12th. Since it's so close to Christmas and on the 12th day of December, I thought it would be cute to do a play on "The Twelve Days Of Christmas". I first did this a few years ago, but thought it would be fun to do it again this year. Christmas is over, but maybe this will give you some cute ideas for your Valentine!


Tim's favorite candy is peanut M&Ms.


Two Lyle Lovett CDs (another of Tim's favs) from the bargain bin at McKay's Used Books. Since I needed to give gifts for 12 days, I tried to keep it as cheap as possible.


Most of these pictures are self-explanatory.


I buy ornaments for the 4 of us every year that are significant to each one of us. Coming up with 4 ornaments just for Tim was a bit of a struggle, but I was having a hard time coming up with 4 of anything else, so I went with ornaments. M&Ms are kind of an inside thing from our dating days (long story, maybe another day), Bootstrap is the name of the construction company he started, the "20 Years Together" are for 20 years since we began dating, and the leaning tower of Pisa represents the trip to Italy that is a "bucket list" item for both of us.


Gold chocolate coins are cheaper than golden rings, and they taste better, according to my 10 (nearly 11)-year-old. ;)


Again, not much to say about this one.


Tim enjoys the occasional spicy food.


Oreos are Tim's downfall. I'd venture to say that Oreos and milk are probably his favorite dessert. If you're wondering why the creme is red, they were from a special holiday edition.


As the numbers got higher, I tried to find smaller, cheaper things. Hershey Kisses give you numerous possibilities.


I have to say, I didn't realize what a challenge it would be to find $10 gift cards. Most of them seem to start at $15. I had to buy this one in a multi-pack, but the other ones made good stocking stuffers.


This candy cane had exactly 11 mini Reese's Cups!


And now we get to Day 12, where I've included my hospital bracelet in the picture. As you all know from a previous post, I woke up at 4am the morning of our anniversary in severe pain. We made a trip to the ER where a kidney stone was discovered. I was SO disappointed that our day together was ruined! I even tried to suck it up so we could still go to our planned breakfast at Loveless Cafe, but I was nauseous and dry heaving in the car, so Tim turned around and took me home. Oh well, maybe next year.

For those of you on Pinterest, there is no shortage of cute Valentine ideas to try out this year. I've pinned a few of them myself. I thought you might appreciate a few more. You've probably heard this before; it isn't the dollar amount that counts, but the thought. Some of the most memorable gifts from Tim have been ones that he didn't necessarily spend a lot of money on, but he instead put a lot of thought and planning into the presentation. In fact, I'll choose quality time with Tim over a pricey gift EVERY TIME. Unless he wants to surprise me with another cruise like he did on my 25th birthday. I wouldn't turn that down. ;)


Thursday, January 12, 2012

Sweet Nothings


Today I'm going to share with you a yummy experiment from this past Christmas. I was first introduced to the idea of cake balls by accident. I was baking Reagan's birthday cake last February, and at some point while the cake was in the oven, I realized I had committed the worst of baking sins: I had neglected to grease my cake pans. I let the cake finish baking, then scraped the delicious cake out of the pans and into a giant bowl. I'm not one to let something go to waste, so after frantically running to the grocery store for more cake mix and getting cake #2 into the oven, I began to ponder just what I could do with the crumbled cake. As usual, I posted my plight on Facebook, hoping for some tips from the baking experts on my friends list. Someone suggested turning the mess into cake balls. I was intrigued, so I searched Google for some recipes. They sounded incredibly easy to make (I'm all about easy when it comes to food), so I gave it a try. Basically, you bake a cake, crumble it all up, and mix it with a container of frosting. Then, you form the cake/frosting mixture into balls, and dip those in chocolate. Easy peasy! My cake was Devil's Food and the frosting was milk chocolate. I then dipped them in white chocolate. They were pretty yummy, but I thought they could be better. I began to ponder other flavor combinations, but being a VERY lazy cook (these are simple, but pretty time consuming to make), I never followed through with another experiment...until Christmas of this year. My mother was in town, and she was in the mood to make some Christmas treats. I told her how I'd thought of doing cake balls using my grandmother's Apricot Nectar Pound Cake mixed with a lemon glaze and dipped in white chocolate. We bought all the ingredients, but because they take at least a couple of days to make, we didn't get around to making them. However, a couple of weeks later, the kids were home from school, and I was bored. We had plans to go to a Christmas caroling party, so I thought I'd give the cake balls a try and hopefully get rid of most of them at the party. I was thrilled with the results! I got rave reviews at the party, and I've had a couple of people ask how I made them. Thus today's blog post!

First, let's start with the cake. Here is the recipe for my grandmother's pound cake. This is, of course, delicious all on it's own. She made this every time family would come for a visit, and I believe if you ask any member of the family, they'd say it was their absolute favorite of Grandma Osburn's dishes. It's SO moist; more so than any pound cake I've ever had.

Apricot Nectar Pound Cake
Lemon Supreme cake mix
1/2 cup sugar
1 can apricot nectar juice (I can usually find it in the juice aisle)
3/4 cup vegetable oil
4 eggs

Sift the cake mix with the sugar. Add juice and oil; mix well. Add one egg at a time and beat well. Normally, you'd grease your bundt pan, but since we don't need a beautiful whole cake, you can skip this step. Bake at 300 degrees for 1 hour.

For the glaze, you'll need 2 cups of powdered sugar and some lemon juice. Like most good cooks, my grandma didn't have an exact measurement for the juice. You just pour enough in until it "looks right". I have to say, I think I got a little happy with the juice, as the glaze was pretty thin. But for cake balls, it seemed to be just right!

Now comes the work. Dump your cooled cake into a giant bowl; add the glaze. Mix this all together. Time to make some cake balls! I preferred doing this by hand, but I could see a melon baller coming in handy here. Also, you may want to make them a little bigger than I did. I made balls that were approximately 1 inch in diameter. There were pros and cons to working with this smaller size. Pro: It was pretty easy to coat them in chocolate without them falling apart. Con: There were SO MANY OF THEM, I thought I'd never be done!! Now, most recipes will tell you to start dipping them in chocolate, but I've learned a helpful trick. I put trays of the balled up cake mixture in the freezer for several hours. This is why making them was a two day process for me. I actually dipped them the next day.

Melt your chocolate in a double boiler (if you have one, which I don't). I melted mine in a glass bowl sitting on top of a pot of boiling water. Only melt small amounts at a time, as the chocolate gets hard to work with as it cools. The process I used was more like coating instead of dipping. I pulled five balls of cake out of the freezer at a time. I stabbed one with a shish kabob skewer, held it over the bowl of chocolate, and spooned the chocolate over it. Drop it on wax paper. The chocolate will harden pretty quickly, so if you want to do something fancy like top them with sprinkles, you have to work FAST. I like to store the finished cake balls in the fridge.

These are so time consuming, but SO WORTH IT. The chocolate seals in the moisture of the cake, and the finished product just melts in your mouth. It's very similar to candy, like a truffle. I'm trying to think of a name for this specific variety instead of just "cake balls". Lemon Drops, maybe? Apricot Nectar Truffles? Hmmm...